I know I mentioned a while back I was building a new concrete countertop with integrated sink to replace our cracked porcelain sink. It began as a fun puzzle. I read all I could and watched every Youtube video on how to do this. I've done concrete countertops (not well) in the past but I wanted to do a better job this time and the sink made it way more complicated. There are sink forms you can buy for about $300.00 but none of them quite fit the cabinetry or space so I decided to build my own sink form. First I built the form for the countertop out of melamine. This part was simple. I just measured the existing countertop and made sides that were 1 3/4 inches high. I drew in pencil where the sink would go.
 Next I built a form which would be the inside of the sink.
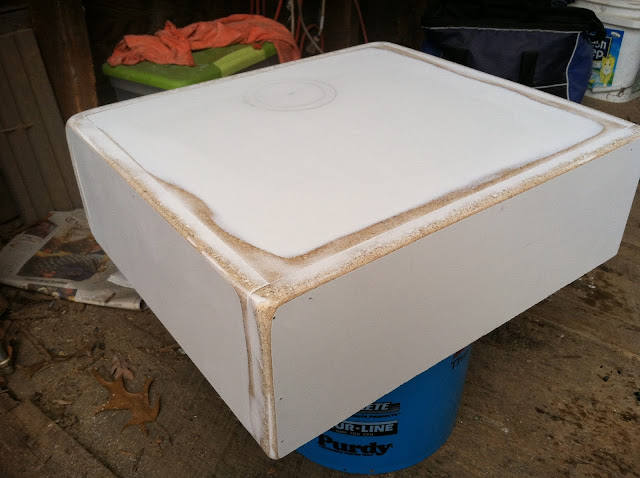 I sanded down all the rough edges and corners and filled in any gaps then sprayed with a clear coat to cover up the exposed particle board. I also marked where the drain should go. Next I had to build the outside box that would form the outside wall of the sink which would hold the concrete in around the inner form. I guess I didn't take a photo of it. It rested on the walls of the countertop form and surrounded the inner sink form, creating a 1 1/2 inch wall. My drain was formed with a piece of PVC, a basin stopper and a few layers of gasket material in the size of the lip of the drain. I used PVC to form the holes for the faucet and the soap dispenser. I also put rebar in after filling the form with concrete about 2/3rds full and also putting some remesh in the floor of the sink. In this picture the rebar is resting on the form but I removed it before pouring concrete.

 There's now a concrete made specifically for countertops. It's a special order though and you can't just go to Lowes or Home Depot to get it. I ordered it from Home Depot because our Lowes doesn't carry this brand. It took a few weeks to come in so I had plenty of time to study my form, measure and remeasure to be sure I had everything just right. I began building the form on November 19th so I had lots of time to prepare for the pouring on December 11th. Here's a picture of the countertop portion with concrete when I placed the rebar in. It's important you note the placement of the sink form and faucet hole.
 Now note the placement of the sink and holes in the next photo after pouring the concrete for the sink and removing the forms.
 Here it is from another angle. Does something look different?
 After we poured the concrete, James was cleaning the tools and I was vibrating the concrete to get the bubbles out, I stopped short and thought I was going to vomit. I realized I had it all backwards. Either the faucet would be on the outside where you stand at the sink or if I flipped the counter the other way it would be where the dishwasher goes. I wanted to cry. Instead I called James over and asked him to help me move things around and see if we could salvage this mess. It meant taking all the concrete off the sink, taking rebar out where faucet holes went and sliding the sink form back to the other side of the form. The sink and faucet holes had been glued down. At this point I could no longer see my pencil lines to know where the edge of the sink belonged and we had to eye it. Nothing was now glued down and I was certain this was a waste of time, melamine and concrete. James just went along with me. As we were doing the final tapping of the form to get bubbles out the outside sink form started coming apart and the concrete was collapsing. I won't go on about how frustrating and defeating this was but we finally called it quits and hoped for the best. I knew if this ended up in our kitchen it would be a miracle.
Getting the inside form out of the sink wasn't easy. We had sprayed it initially with Pam hoping the concrete would release easily but since we had scraped the concrete off once and had to reapply it any releasing agent wouldn't have worked. We had to chisel the melamine out. I worried about breaking the sink, or at the very least, making a mess of the floor of it.
 Once we removed the forms completely I measured things and went inside to remeasure the cabinet to see what wasn't going to work. As far as I could tell it looked like things were pretty close to what they should be. I decided to keep working on it and spent a few weeks trying to get the finish the way I wanted. There were several air bubbles. I mixed up a slurry of portland cement, concrete bonder and fortifier, along with some black concrete colorant. This made a neat design out of the air bubble holes, I thought. Notice the rough edges and the rough groove around the inside of the sink.
 I kept resurfacing the counter and sink with the portland cement mix, then sanding it down or grinding it when I was really unhappy with my attempts. At one point I tried staining it and hated the outcome so I put another coat of slurry on it and began again. I'd have to say most of my expense on this whole project was on sandpaper and grinding attachments. Here it is at one point along the way. Notice how the edges are getting smoother.

 My goal was for it to look like stone. I feel like the finished product looks very much like it. Today we installed it and to my great surprise it fits and looks awesome. After all the headaches and things that went wrong, today things went right. Even the plumbing only took one try with no leaks. I can't stop looking at it or rubbing my hands on it. It's silky smooth and shiny. It's finished with 2 coats of grout sealer, followed by 2 coats of paste wax.


 I think it would look way better with a stainless steel dishwasher to match the rest of our appliances but this one still works. I can't get any pictures that really do it justice or maybe I just think it's prettier than it really is.


 Maybe the reason I like it so well is because I was so sick of looking at this.

 In total this whole project cost around $400.00, including faucet, drain, plumbing hardware, concrete, etc. I had a lot of the tools, equipment and products in my garage or basement so that saved some money. From what I've read it would have cost approximately $1,500.00 to hire someone to build this for me so I'm pretty happy about that. Next project is to reface the other existing concrete countertops, using the portland cement mix. I have a few ideas for designs, which I'll save for another blog. I know this was a long one but it was a long time in the works.


This is the gasket material I cut for the drain.


Getting the inside form out of the sink wasn't easy. We had sprayed it initially with Pam hoping the concrete would release easily but since we had scraped the concrete off once and had to reapply it any releasing agent wouldn't have worked. We had to chisel the melamine out. I worried about breaking the sink, or at the very least, making a mess of the floor of it.


Only you, Karen, only you . . . it looks magnificent!!
ReplyDeleteSometimes I still think of that sick baby pig being washed in the old one. Happy you switched it out!!
Karen, I'm not sure I understand what went wrong or even how in the world you managed to make this, but I think it look amazing! You should definitely be proud of this accomplishment!
ReplyDeleteWow...incredible. Way-da-go Karen, you are AMAZING !!!!!
ReplyDeleteYES, Truly AMAZING. If it looks better than the pictures, you should make 4 more, sell them for $6K, and let your animals live out their lives with fun things you could do with the money. If you mess up on any, they could become goat slides or nesting boxes, or…...
ReplyDeleteI’m amazed that you were able to make that yourself, especially since you hooked up all the plumbing as well. I do have to say that it looks phenomenal, especially since the faucet creates a seamless look with the rest of the counter. That countertop is miles better than what you had before.
ReplyDeleteLovella Cushman @ Perfection Plumbing
This article nails the essentials. I followed up with Modesto Remodeling Experts to bring my ideas to life.
ReplyDelete